Courtesy: Anish Kadakia and Acumed LLC
Posteromedial Approach for Posterior Malleolus Fracture
(Ankle fracture fixation)
- Plate Design Features
The Acumed Ankle Plating System 3 plates are designed to be soft-tissue friendly.
Key features:
- Distal portion: thinner profile ? reduces soft tissue irritation
• Distal screw cluster: 2.7 mm locking screws
• Proximal screws: 3.5 mm (locking + non-locking options)
• Anatomical contouring for:
- Fibula
- Posterior tibia
- Medial malleolus
- Small avulsion fractures
Advantages:
- Better anatomical fit
- Less soft tissue irritation
- More stable fixation than traditional 1/3 tubular plates
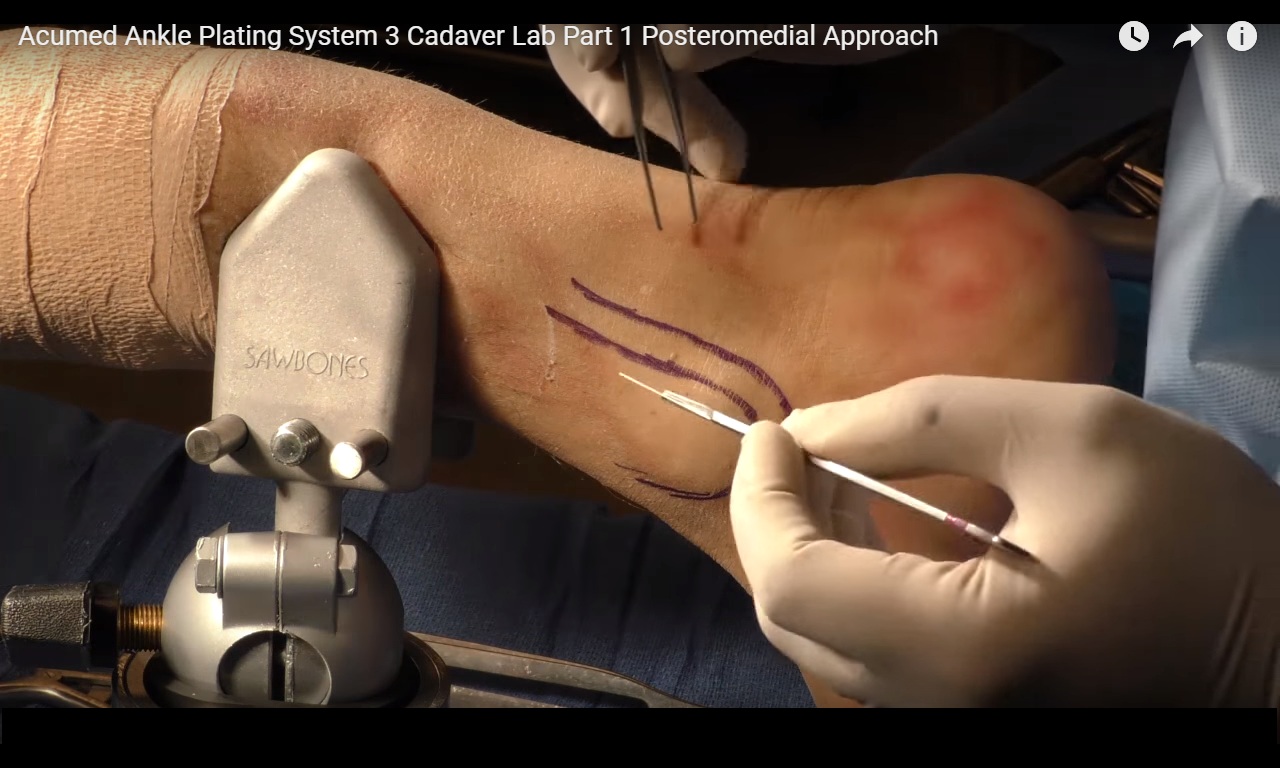
Posteromedial Surgical Approach (Posterior Malleolus)
- Goal
To expose the posteromedial tibia for fixation of posterior malleolar fractures.
- Key Anatomical Structures
Important landmarks:
Posterior medial ankle structures:
- Posterior border of tibia
• Posterior Tibial Tendon
• Neurovascular bundle containing:
- Posterior Tibial Artery
- Tibial Nerve
The approach avoids the neurovascular bundle.
- Skin Incision
Incision is made:
Between
- Posterior tibial tendon
- Posterior border of tibia
Advantages:
? Keeps surgeon away from neurovascular bundle
? Direct access to posterior tibial groove
Incision length:
- Usually short because fracture fragment is small.
- Surgical Steps
Step 1 – Skin incision
Make incision just medial to the posterior tibial tendon along the posterior tibial border.
Step 2 – Identify tendon sheath
Expose the posterior tibial tendon sheath.
Step 3 – Open tendon sheath
Carefully incise the sheath.
Important:
? Avoid injury to the posterior tibial tendon.
Step 4 – Retract tendon
Retract the posterior tibial tendon laterally.
Now the surgeon can clearly see:
- Posteromedial tibia
• Posterior malleolar fracture fragment
Step 5 – Periosteal incision
Incise the periosteum over the posterior tibia.
Reason:
- Posterior malleolar fractures often have thick periosteum.
Step 6 – Exposure
Use retractors (e.g., Army-Navy) to expose the entire posterior tibia surface.
Key point:
? Large exposure obtained
? Neurovascular bundle not disturbed
- Plate Placement
The posteromedial tibial plate is placed:
- Along the posterior border of tibia
• Inside the posterior tibial groove
Design allows:
? Anatomical fit
? Stable fixation of posterior malleolus fragment
- Closure
Important step:
- Close the posterior tibial tendon sheath
Reason:
Prevents tendon subluxation.
However:
Risk is low due to postoperative scarring, but closure is recommended.
Key Surgical Advantages
? Safe approach
? Avoids neurovascular bundle
? Direct fracture visualization
? Good plate positioning
? Minimal soft-tissue trauma
? Clinical relevance (for anaesthesia / OT team):
During these ankle fracture surgeries:
- Patient position often prone or lateral
- Regional anaesthesia options include:
- Sciatic Nerve block (popliteal)
- Saphenous Nerve block
These provide excellent analgesia for posterior ankle surgery.
Leave a Reply