Courtesy: Randy Bindra FRCS Orth and Acumed Inc
Lateral Plating Technique for Phalangeal Fractures
Overview
- Lateral plating is used for selected phalangeal fractures requiring stable fixation
- Technique aims to:
- Preserve tendon gliding
- Minimize soft tissue irritation
- Allow stable fixation with early motion
- Careful plate positioning is essential to avoid impingement and stiffness
Incision Planning
- Incision placed along the mid-lateral aspect of the finger
- Finger flexed to identify:
- Apex of joint creases
- Marking joint creases helps:
- Proper exposure
- Safe lateral plate placement
Exposure
- Self-retaining retractors improve visualization
- Important to identify and preserve:
- Dorsal sensory branch of digital nerve
Structures exposed carefully:
- Lateral band of extensor mechanism
- Lateral aspect of phalanx
Handling of Extensor Mechanism
- Extensor mechanism elevated dorsally
- Lateral band exposed carefully
Important points:
- Simple elevation usually sufficient
- Lateral band release may be required in proximal fractures
Goal:
- Adequate bony exposure while preserving tendon function
Periosteal Elevation
- Periosteum incised and elevated on both sides of phalanx
- Soft tissue preservation is critical
Purpose:
- Improve fracture visualization
- Permit plate application
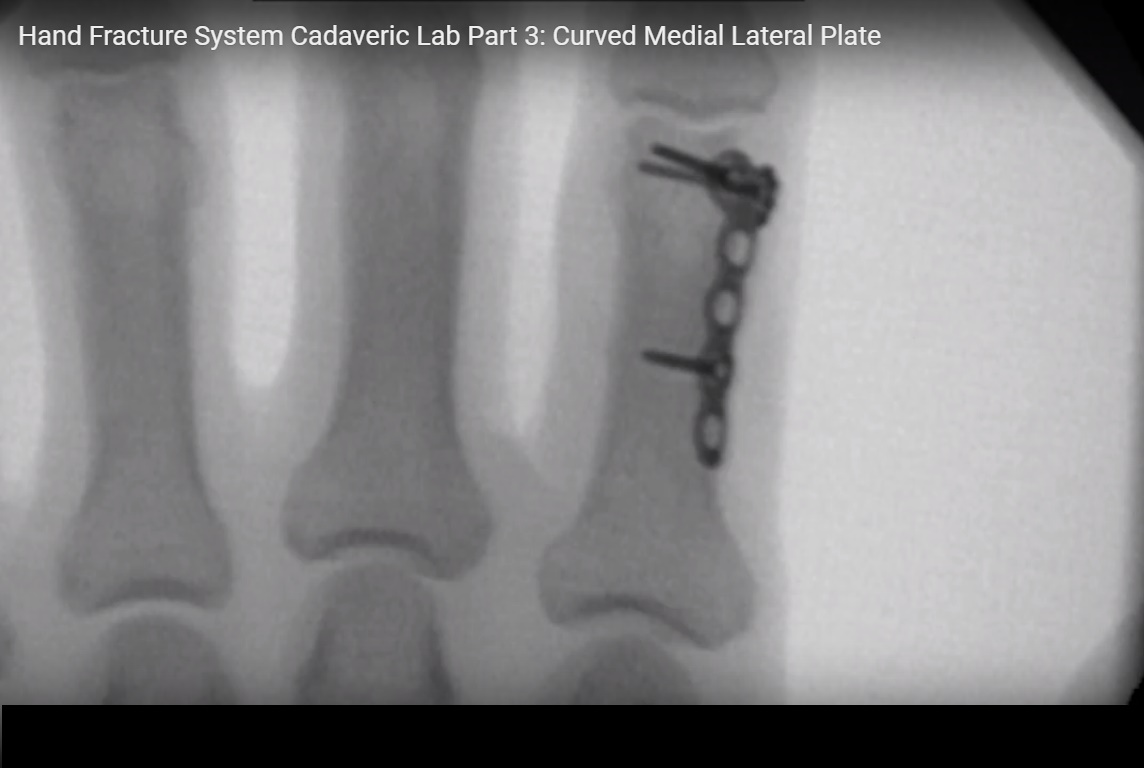
Plate Positioning
Plate Location
- Plate placed along lateral aspect of phalanx
Plate Adjustment
- Plate length adjusted according to fracture pattern
- Proximal portion may be trimmed if needed
Temporary Fixation
- Plate holder used initially
- Fluoroscopy confirms:
- Plate position
- Alignment
- Fracture reduction
Initial Fixation Technique
Sequence:
- Compression of plate against bone
- Locking fixation afterward
Principle:
- Compression improves plate-bone contact
- Locking increases construct stability
Distal Fixation Considerations
Important Principle
- T-shaped portion of plate must be centered over condyle
Correct placement ensures:
- Safe screw trajectory
- Stable distal fixation
Complications of Malposition
If plate/screws placed too volarly:
- Mechanical impingement
- Block to interphalangeal flexion
- Tendon irritation
Screw Insertion Technique
- Distal screw drilled with ~15° proximal angulation
- Compression achieved before final locking
Goal:
- Plate sits flush against bone
- Avoid prominence
Completion of Fixation
- Remaining proximal screws inserted
- Stability checked intraoperatively
Assessment includes:
- Alignment
- Rotation
- Construct stability
Functional Assessment
Critical final step.
Check:
- Free gliding of lateral band over plate
- Full finger flexion and extension
- Absence of mechanical obstruction
Goal:
- Preserve smooth tendon excursion
- Prevent postoperative stiffness
Key Surgical Principles
- Preserve soft tissue structures whenever possible
- Protect digital nerve branches
- Maintain extensor tendon gliding
- Ensure accurate lateral plate placement
- Avoid volar screw prominence
- Assess finger motion intraoperatively
Important Complications to Avoid
- Tendon irritation
- Mechanical impingement
- Loss of flexion
- Joint stiffness
- Hardware prominence
- Extensor dysfunction
High-Yield Exam Pearls
- Mid-lateral incision commonly used
- Protect dorsal sensory branch of digital nerve
- Lateral band usually elevated, not divided
- T-plate must be centered over condyle
- Volar malposition blocks flexion
- Intraoperative motion testing is essential
- Proper plate positioning preserves tendon gliding

Leave a Reply